Keeping Sewage / Foul Water out of your home by building a secondary system

As in the article “Keeping sewage surcharge out even during flood” Once the sewer is flooded you cannot use anything, toilet, sink, shower and so on.

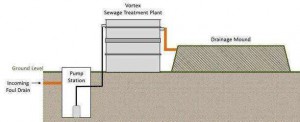
One of the best ways is having a room where the sewer pipe goes directly to a separate treatment plant, away from main sewer.

or

You could have a secondaary soil pipe next to the one that runs up the side of your house to the bathroom, you don’t need to go as high with this, as long as its above 1 meter. It would be capped until you need it.

When needed, you would simply take the cap off and pull the other pipe (existing) to it, this would be connected directly to a pump chamber, (there would be no manholes, gullys, anything that would allow ground water to penetrate).

The overall area needed would be a minimum of 4m x 4m (12sq.m) for the tanks.

The pump chamber would be connected to the treatment plant, both would be raised about a meter out of the ground, this would stop ground water getting into the lids.

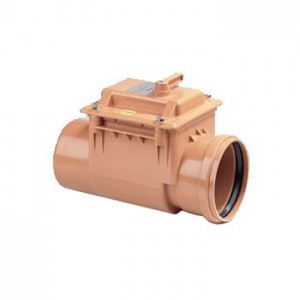
Because it’s a treatment plant it would have an out flow pipe to get rid of clean treated water, you could make a raised flower bed at 1 meter high with a non-returnable valve on, or if the utility room was only for emergencies have the overflow pipe with a return valve on just sick out the tank.

As it is only for emergencies the tank would be the smallest and would last you months before it would need emptying
8063953

I am a District Councillor on Planning, and any new properties being passed are raised a minimum of 500mm out of the ground (unless they are to close to the nearest property) this helps keeping the house safe.

Just as a rough estimate of cost it would be in the region of £10,000 this would include Pump chamber, Treatment Tank & 20m of 4″ underground pipe.

I would also recommend any new house you may be intending to do, in a flood risk area when building the over site use block and beam (suspended floor) on a minimum of 2 courses of blue engineering brick.
As well as the sewer option.

KEEPING SEWAGE SURCHARGE OUT DURING FLOODS

11311On the news today, 25th December 2015, winter devastating floods again gripped the nation. Backwater flooding is a particularly distressing form of flooding – but could happen at any time. I would like to describe the causes and how it can easily be prevented.
You may have heard it called sewer flooding, sewer surcharge or backwater flooding – they’re all names to describe the same issue, when sewage flows the wrong way in the sewer pipework, back into properties. Untreated sewage flowing back through sinks, toilets and other drains can bring with it disease.

Many factors contribute toward backwater flooding incidents. These factors can broadly be classed into two categories: those that increase the flow within a sewer to a level higher than it can cope with; and factors such as blockages or damage within the sewer network which prevent it from functioning as it should.

In the first instance, other forms of flooding, such as storm events can lead to sewer flooding. In some parts of Lincolnshire, our foul and surface water drains are combined. Excessive rain, river or tidal water can fill the sewer, forcing sewage back the way it came. And the Environment Agency believes this threat will worsen: “It is likely that with climate change … flood risk in England is going to increase in the future.

Additionally, an increase in hard standing, from continued urban development, diverts rainwater into the drainage network, and at a faster speed, when previously it would have been absorbed into the earth, recharging groundwater. Although the Government is tackling this issue, including it in new build assessments and tightening planning restrictions on paving over gardens, impacts from further development will continue to grow.

As I am on Planning in South Holland District Council and I am also on the South Holland Internal Drainage Board, I get first hand information on how local authorities are going to tackle the situation.

However, prevention at property level is fairly straightforward. Avoidance of blockages is paramount. In addition, the fitting of backwater protection products can completely prevent sewage from re-entering a property.

The alternative is a non-return valve (NRV), which is fitted into the main sewer pipe. Make sure its fitted before any manhole, gullies etc. (or else the ground water will just flood over the top.)

These valves are fitted by drainage operatives and are permanently located and ready to activate. They allow foul water to exit the property, but prevent any coming back when the sewage pipe is full.

Concrete Head Walls (Culverts)

image
Waiting for 2 extra cu.m to finish base
image
Back side of the shuttering

Shutting

image
The face side of the head wall
image
Cleaning under the steel
image
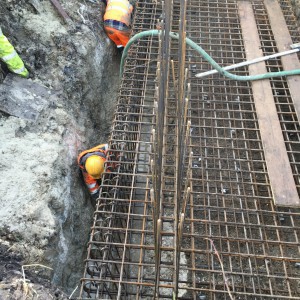
Clean soil off the steel bars, prior to concreting
image
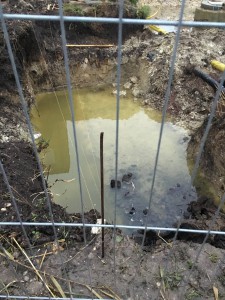
Day one, clean out
image
Excavate the first head wall
image
Day 2 after the rain
image
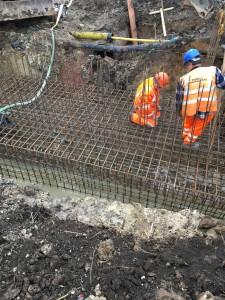
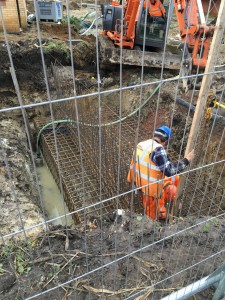
Lifting the cage into place, and putting 50mm spacer under the bars

New contract started 9th December 2015:

3 vehicle accesses on to a new housing estate.  Because vehicles have to cross a dyke there needs to have a culvert built, this is 2 head walls either side of the new access, built with concrete and reinforcement bars.

Day 1 after Highway approval, (as this is part of a S278) set up site as the norm

Day 2 As we are in a dyke, we have a water problem, best solution is when excavating, use the material to dam up the dyke. Pump the rest out.

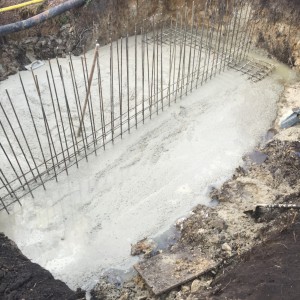
Day 3 Road Entrance 1, Base of the first Head wall 6m x 3m (it is 2.4m below road level) knock some pegs in the soil base and concrete with lean mix, concrete about 50mm thick. This will be for the steel fixers to work on.

Day 4 Put together the steel bars, using plan and bar schedule. Fairly easy to read, example H16/02/39/3760 this is 16mm bar / 02 on plan / 39 bar / 3.760 lengths. Read with plan.

End of week 1

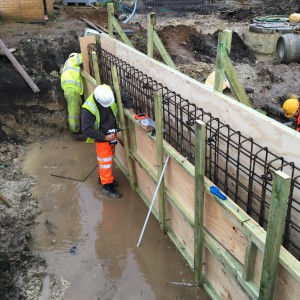
Day 5 After fixing steel, clean off the muck on concrete base in the dyke – lift into place – sit the steel on spacer 50 – 60mm

Day 6 complete steel fixing & get checked off by site manager & Highways

Day 7 Pour concrete

Day 8, 9, & 10 put together the steel for the other side & excavate base

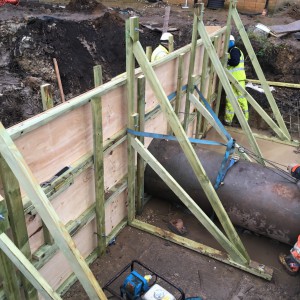
Day 11 Monday 21st December 2015 Fix Concrete Pipe 600mm diamter inside steel bars & Shutter

Day 12 Concrete Headwall

Small 5 Metre Bridge Over a Dyke

imageimageimageimageimageimage

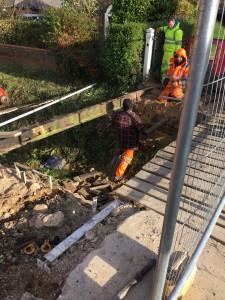
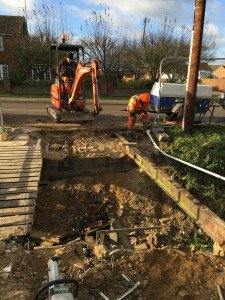
Customer in Long Sutton has had enough of replacing timber on her bridge.

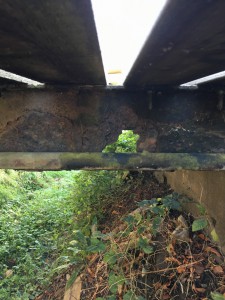
We were invited to see what we could do to help.  On investigating the bridge, two of the RSJs had totally rotted through.

Day 1: Break out old existing Steel RSJ (leaving just 2 and hand rail for access to house)

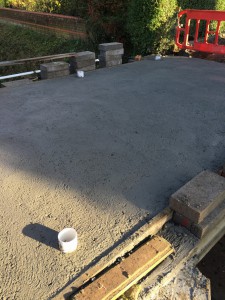
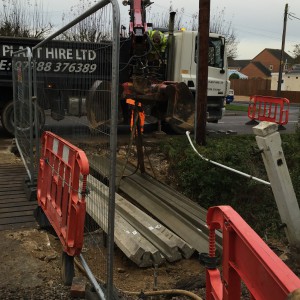
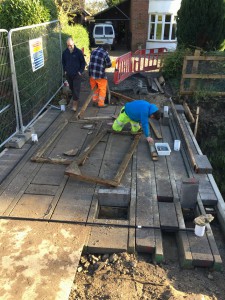
Day 2: Supply & fix twice as many concrete beams to replace the RSJ, lay the recommended blocks between the beams.

Day 3: Take out the temporary walk way & complete the block and beams

Day 4: Concrete the whole area with RC35 + a layer of A142 steel mesh forming a camber in the middle of the bridge

Day 5: Brick work to both sides of the bridge, allowing for drainage pipe (1″ diameter) to take away surface water this work to be carried out by customer’s own bricklayers.

Complete bridge when bricklayers are finished, with 10mm dense bitumen or 10mm medium textured (I prefer) wearing course 125 pen.